

Hello everyone and welcome to our September blog hop by the Art with Heart team.
Tonight, team members are sharing amazing projects featuring Stampin' Up! Designer Series Paper.
Stampin' Up! currently have a Designer Series Paper SALE happening!
Purchase three packets of DSP, from a select range, and receive one packet FREE! This offer ends on September 30th - so hurry and don't miss out on this great deal!

My first project features the 6" x 6" Designer Series Paper from the Brights colour collection.
***(Please note - this DSP is not part of the promotion.)***

Tonight, team members are sharing amazing projects featuring Stampin' Up! Designer Series Paper.
Stampin' Up! currently have a Designer Series Paper SALE happening!
Purchase three packets of DSP, from a select range, and receive one packet FREE! This offer ends on September 30th - so hurry and don't miss out on this great deal!

My first project features the 6" x 6" Designer Series Paper from the Brights colour collection.
***(Please note - this DSP is not part of the promotion.)***

These gorgeous little bags were given as a thank you to each of the ladies who attended one of my recent classes.
I always give a small gift of something in either a box or bag. I was really happy to have found this video tutorial by Chris Slogar of Buckeye Inklings. I made a few changes to measurements, but it's mostly the same. Thank you Chris!

I used the matching coloured cardstock for the handles and closure. The closure was made using the Tailored Tag punch, and then I added a die-cut stitched heart from one of the Stitched Be Mine dies. The tailored tag attaches at the back with some Tombow glue but has a mini Velcro dot to fasten it at the front. 'For you' was stamped in the coordinating ink and it is from the Itty Bitty Greetings stamp set.
A clear rhinestone was all the embellishing I felt the little bags needed.

I just love the colours in the Brights colour family. The 6" x 6" Designer Series Paper is available in all our colour collections. How great is that?!

I always give a small gift of something in either a box or bag. I was really happy to have found this video tutorial by Chris Slogar of Buckeye Inklings. I made a few changes to measurements, but it's mostly the same. Thank you Chris!

I used the matching coloured cardstock for the handles and closure. The closure was made using the Tailored Tag punch, and then I added a die-cut stitched heart from one of the Stitched Be Mine dies. The tailored tag attaches at the back with some Tombow glue but has a mini Velcro dot to fasten it at the front. 'For you' was stamped in the coordinating ink and it is from the Itty Bitty Greetings stamp set.
A clear rhinestone was all the embellishing I felt the little bags needed.

I just love the colours in the Brights colour family. The 6" x 6" Designer Series Paper is available in all our colour collections. How great is that?!

Do you have a favourite Stampin' Up! colour family?
My second project is a Shutter card. I have been wanting to make one of these Fancy Fold cards for a while now, and decided to finally make one using the lovely Garden Lane Designer Series Paper which is one of the packs in the Buy three, get one FREE sale.
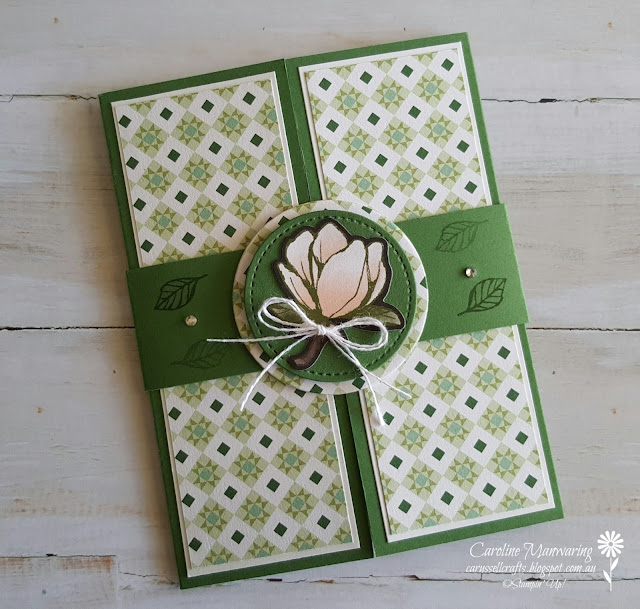
This is one of the card designs that I have for my card class this week. They look complicated to put together but that's not the case at all.

You can see how the 'shutter' mechanism is reflected in my choice of pattern. If you are a fan of the colour green, then this is definitely the paper for you. The colours are: Garden Green, Mint Macaron, Mossy Meadow, Pear Pizzazz and Soft Sea Foam with Whisper White as the background colour.

The writing panel is attached to the back of the card. I love the little stamped leaf on the back of the belly band.

The stamped images and sentiment are from the Magnolia Blooms stamp set in the Stampin' Up! Beginners Brochure, and they are stamped in Mossy Meadow ink.
I can't wait to see what the other team members have created with their favourite Designer Series Paper for our blog hop tonight.
Click the 'Next blog' button below to visit the lovely, Sujatha's blog.

If you find a broken link or have come to this blog hop from a different entry point, below is the list of tonight's participants.
My second project is a Shutter card. I have been wanting to make one of these Fancy Fold cards for a while now, and decided to finally make one using the lovely Garden Lane Designer Series Paper which is one of the packs in the Buy three, get one FREE sale.
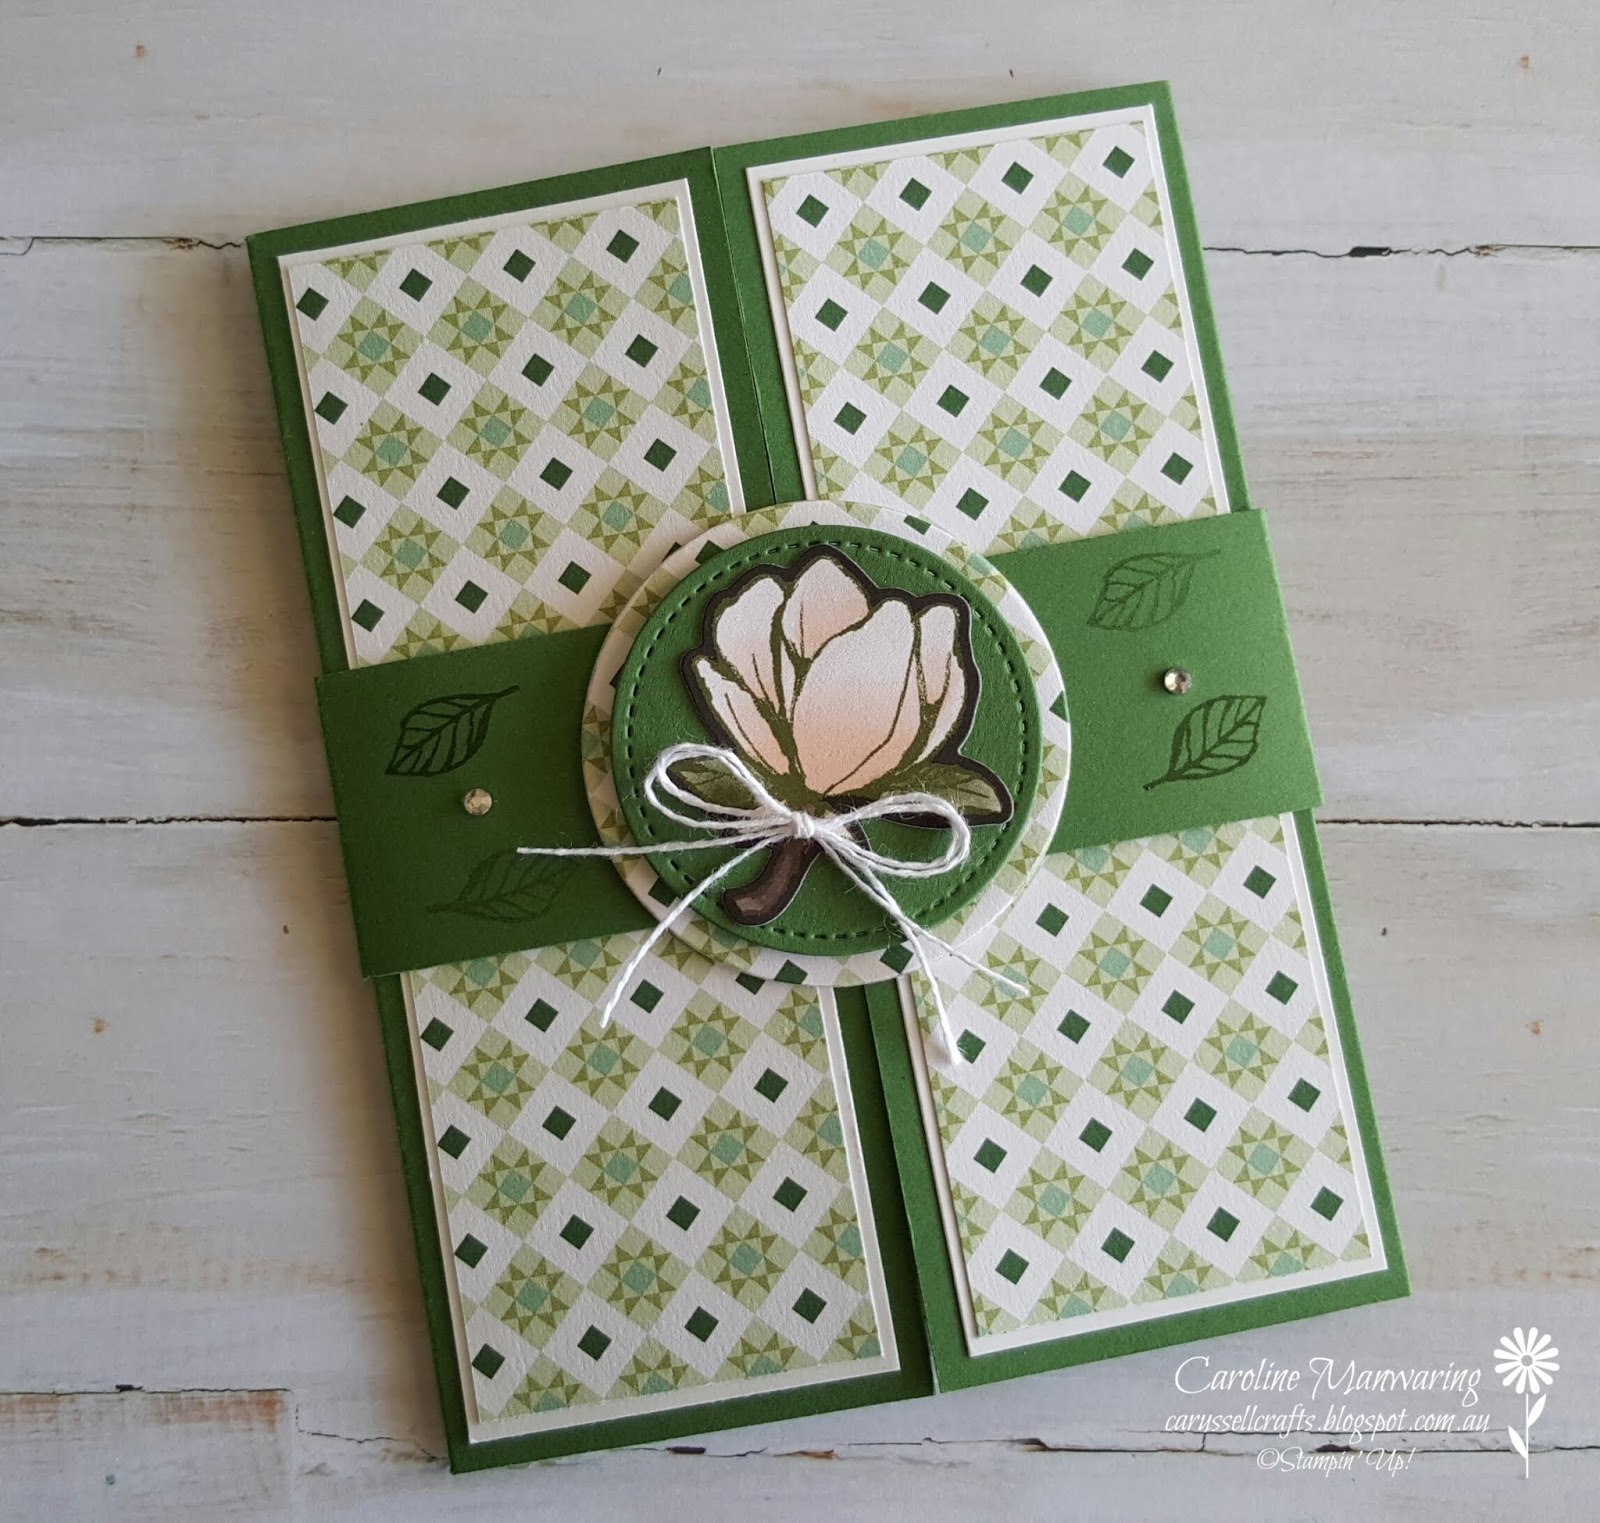
This is one of the card designs that I have for my card class this week. They look complicated to put together but that's not the case at all.

You can see how the 'shutter' mechanism is reflected in my choice of pattern. If you are a fan of the colour green, then this is definitely the paper for you. The colours are: Garden Green, Mint Macaron, Mossy Meadow, Pear Pizzazz and Soft Sea Foam with Whisper White as the background colour.

The writing panel is attached to the back of the card. I love the little stamped leaf on the back of the belly band.

The stamped images and sentiment are from the Magnolia Blooms stamp set in the Stampin' Up! Beginners Brochure, and they are stamped in Mossy Meadow ink.
I can't wait to see what the other team members have created with their favourite Designer Series Paper for our blog hop tonight.
Click the 'Next blog' button below to visit the lovely, Sujatha's blog.
If you find a broken link or have come to this blog hop from a different entry point, below is the list of tonight's participants.
Caroline Manwaring <<< you are here >>>
Well, that's it from me tonight - thank you for stopping by.
If you're leaving a comment below, thank you so much.
I read and appreciate them all. 💗
See you next time 😘
See you next time 😘

Product List


